← SDK Installation
← Xvisio SDK Documentation Home Page
Linux/Ubuntu - Xvisio SDK Download and Install Guide
Note:Since there is a translation layer between usb3.0 of the virtual machine and the hardware of the machine, it will cause instability and performance of usb communication, so it is not recommended to install and use xvisio sdk and devices in the VM.
Prerequisites
Keep Ubuntu to the latest version
Update Ubuntu distribution, including getting the latest stable kernel:
sudo apt-get update && sudo apt-get upgrade && sudo apt-get dist-upgrade
Ubuntu Dependency Library Installation
Install dependent library:
sudo apt-get updatesudo apt-get install -y tree g++ cmake cmake-curses-gui pkg-config autoconf libtool libudev-dev libjpeg-dev zlib1g-dev libopencv-dev rapidjson-dev libeigen3-dev libboost-thread-dev libboost-filesystem-dev libboost-system-dev libboost-program-options-dev libboost-date-time-dev liboctomap-dev
Install usb permissions:
Download permissions file 99-xvisio.rules.
Open a terminal in the directory where you downloaded the file and input the command:
sudo cp 99-xvisio.rules /etc/udev/rules.d/sudo udevadm control --reload-rules && udevadm trigger
Download and Install
Xvisio SDK only supports three distribution versions of Ubuntu OS: amd64 ubuntu18, amd64 ubuntu20 and arm64 ubuntu18.
Please contact Xvisio FAE for any questions or requirements。
In order to avoid version management confusion caused by automatic upgrade, Xvisio will only provide deb upgrade package for upgrading, the operation steps are as follows:
- amd64 ubuntu18
- Get the latest installation package: Please download the installation package which contains the words "bionic_amd64.deb"
- Enter into the download directory and execute the installation command:
sudo dpkg -i xvsdk_3.x.x-xxxxxx_bionic_amd64.deb
- amd64 ubuntu20
- Get the latest installation package:,Please download the installation package which contains the words "focal_amd64.deb"
- Enter into the download directory and execute the installation command:
sudo dpkg -i xvsdk_3.x.x-xxxxxx_focal_amd64.deb
- arm64 ubuntu18
- Get the latest installation package: Please download the installation package which contains the words "bionic_arm64.deb"
- Enter into the download directory and execute the installation command:
sudo dpkg -i xvsdk_3.x.x-xxxxxx_bionic_arm64.deb
Check Installation
Run the "demo-api" program to check the SDK version:
- Open a terminal,input the demo application name and press "Enter":
demo-api

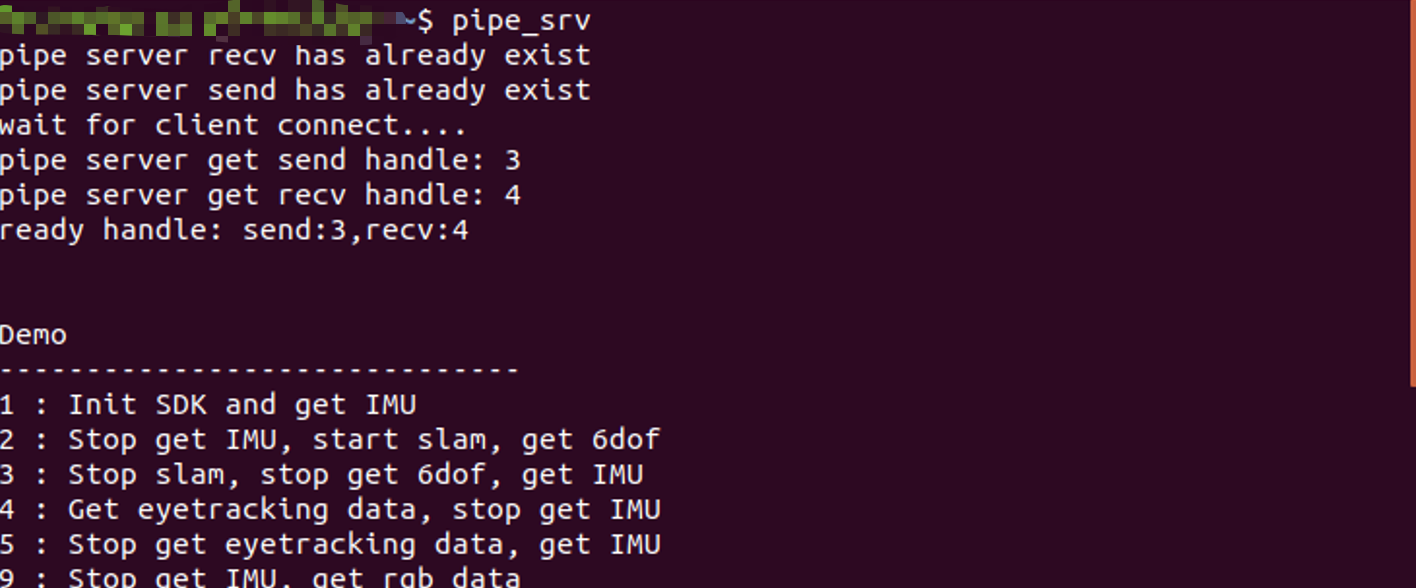
- Open another terminal at the same location, input “pipe_srv” and press "Enter":
pipe_srv

"pipe_srv" and "demo-api" must be opened in the same directory - Type character "1" on the terminal of "pipe_srv" and press "Enter" and observe the output of the "demo-api" terminal:

If the installation is successful as shown in the figure, it will output:
xvsdk version: 3.2.x-xxxxxxxx
Please check whether the read version is the same as the installed version. The currently installed version information is:obtained here .
You can check this item without connecting the Xvisio device.
Check the Installation Directory
Please refer to Linux/Ubuntu SDK directory to check whether it is consistent with the corresponding installation directory.